
Hello!
I’m presenting you my very first build for Last Epoch for patch 0.7.0F! I’ve reached in the new buffed arena to wave 256 with it and it’s probably the best build that I could have started the game with. It’s power level can definitely go a lot higher but I simply lack the will to grind better gear and arena waves right now. Even though some nodes being bugged / not as strong as they should be, the build is still extremely strong.
I highly doubt that this build will get nerfed simply because there isn’t anything inherently broken, it’s all just very well optimized; if anything, this build will probably get buffed loads after the bugs are fixed ![]()
The build starts working effectively from level 25 and reaches it’s peak potential at level 75. After that you can still keep min-maxing your build for Arena waves. With proper itemization and grind, it currently should go 350+ arena.
![]()
![]()
VIDEOS
Arena 245 > 256
Unlucky crits!

PROS
Very smooth acting, great for starting the game
Rewards skill
Can do max 140+ rarity / all mods monolith fast
Crazy high DPS - max hit so far is 75K, average 25-35K
Massive AOE for quick Arena & monolith runs
Very engaging
One of the least clunky skills
No uniques required
HOW TO PLAY THIS BUILD
This build is all about slamming with your Erasing Strike and replenishing your mana with Volatile Reversal. If you happen to be in a tight spot, you can save yourself by channeling Rebuke. Your movement skill is Lunge which itself often does enough damage for small trash and also gives you great defensive buffs. For hard fights, you enable Holy Aura and start super slamming! While buffed and doing Volatile Reversal rotations perfectly, you will have most likely the highest DPS in the game!
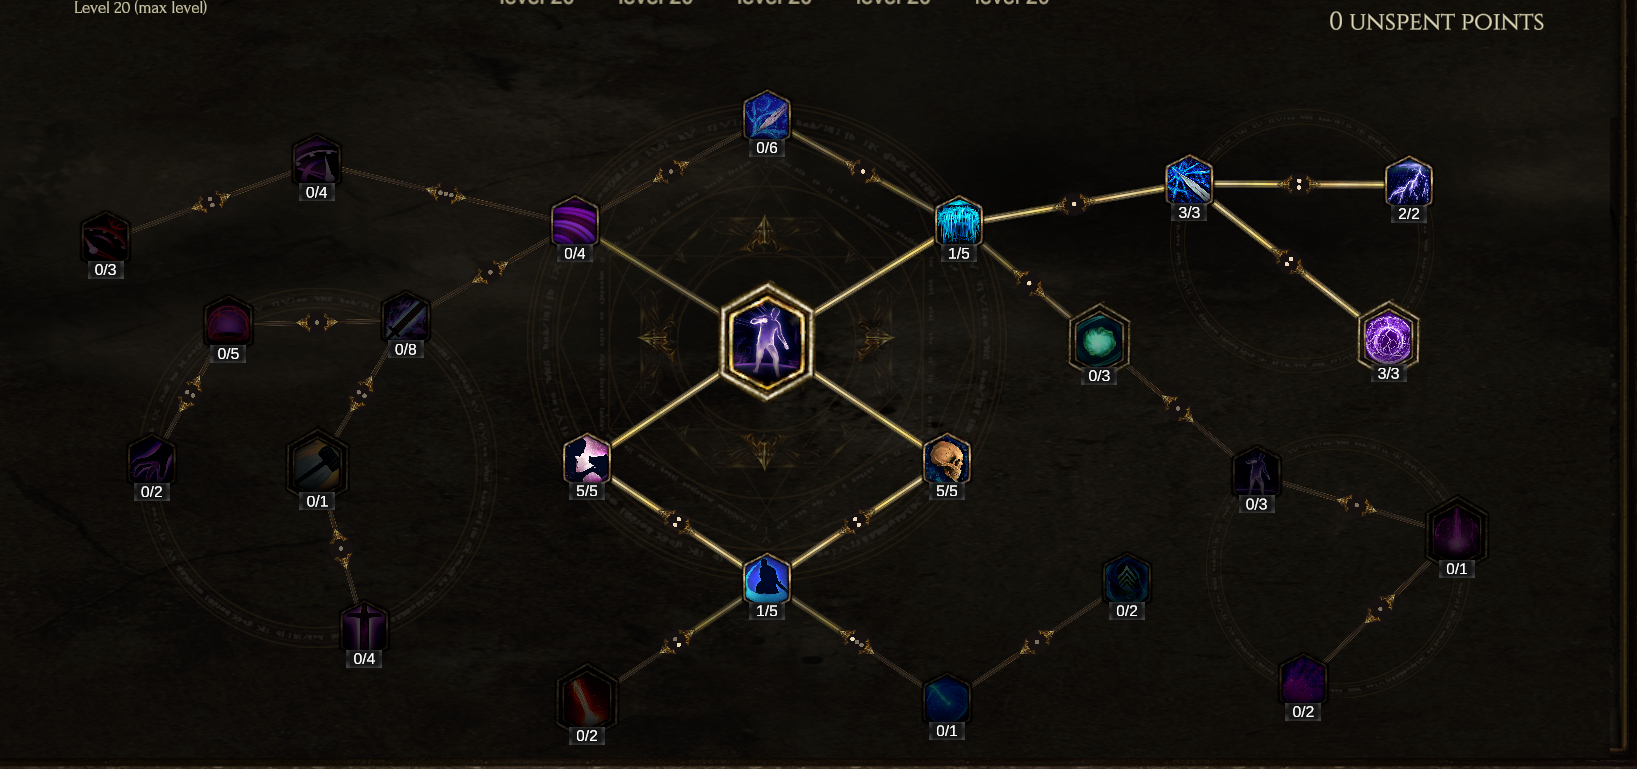
ERASING STRIKE
The most optimal way to use your Erasing Slam is to start slamming from 100 mana and do 3 strikes after which you instantly use Volatile Reversal to get back to 100% mana. Learning the timing might take some time but once you get it right, it will feel awesome!
REBUKE
Remember, this skill gives you ~ 80% less damage taken, doubles your mana regen and the more you get hit, the more damage you will do.
I use it mainly to start off Arena waves so the monsters would group up around me for an easy clear. If I’m low on mana in a dangerous situation, I often channel it to regain my mana to 100% in a safe spot and start my Erasing Strike rotation again.
It’s also extremely useful if you’re getting slammed by spells / on death effects which you have no time to run away from, such as hellhound / flying skull explosions.
VOLATILE REVERSAL
Don’t spam it randomly and try to have a tempo with it. Don’t use it if you’re not certain if you’ll be teleported in the middle of hard-hitting mobs. This skill also removes your slows.
LUNGE
The most efficient way to use it in monoliths is to hold down your Lunge key and move your mouse in the top of your screen to have long-range Lunges. The distance is infinite and it can hit sooner than you see the enemy. This skill also targets boxes which can be used to close gaps as well.
It’s also a very good skill in Arena to jump on ranged mobs as it makes you invincible during the travel and after travel gives you a giant defensive boost for a few seconds.
I use it as much as I can in the Arena because it essentially doubles your elemental & void resistances.
HOLY AURA
You should activate Holy Aura 1 second before you engage so you would have enough mana to do your Erasing Strike rotations. Otherwise while farming you can let it chill. Although the description of not having any buffs while it’s on cooldown might sound scary - it’s only 25% of the time which you don’t have it up. You could also get a cooldown reduction helmet and lower it even more!
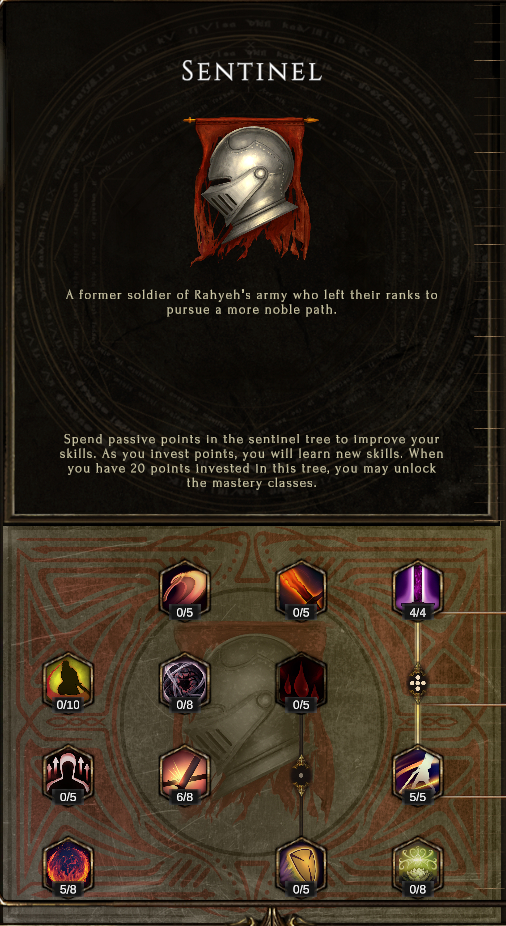
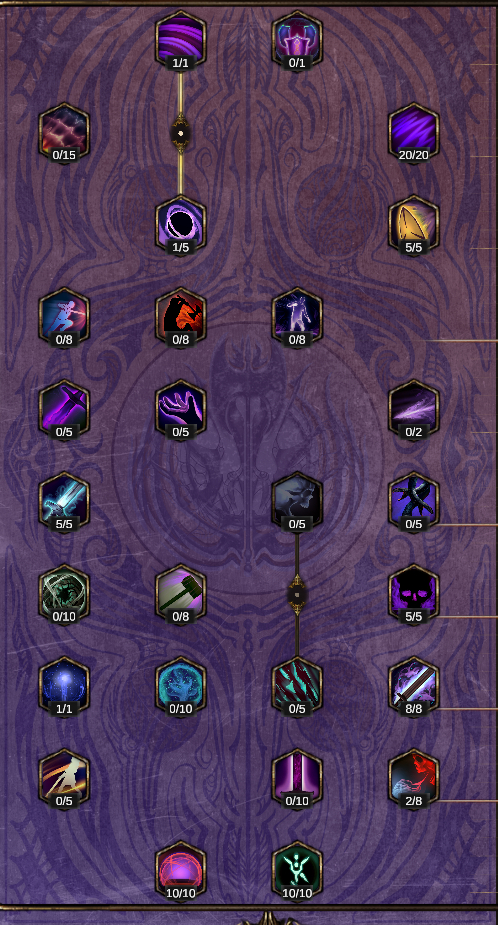
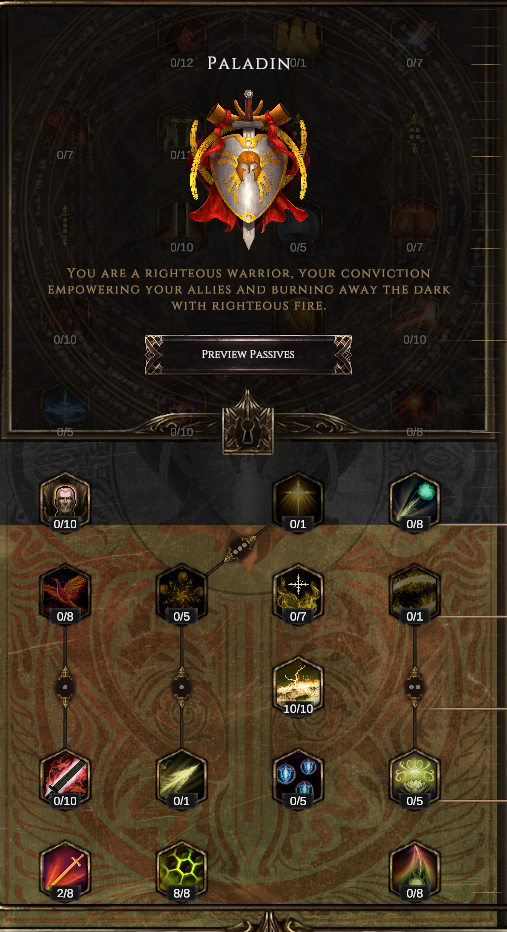
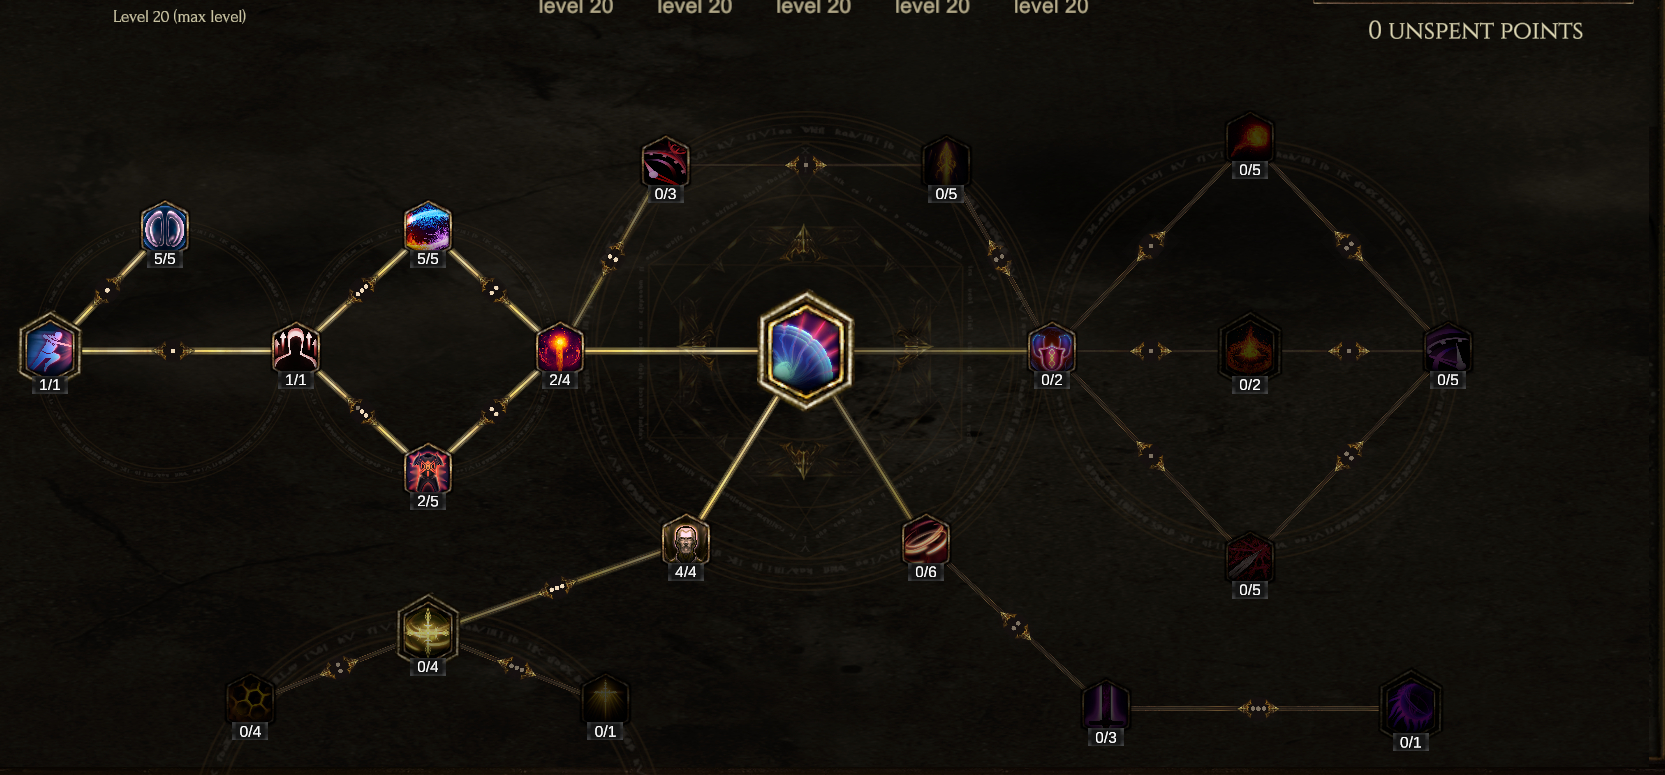
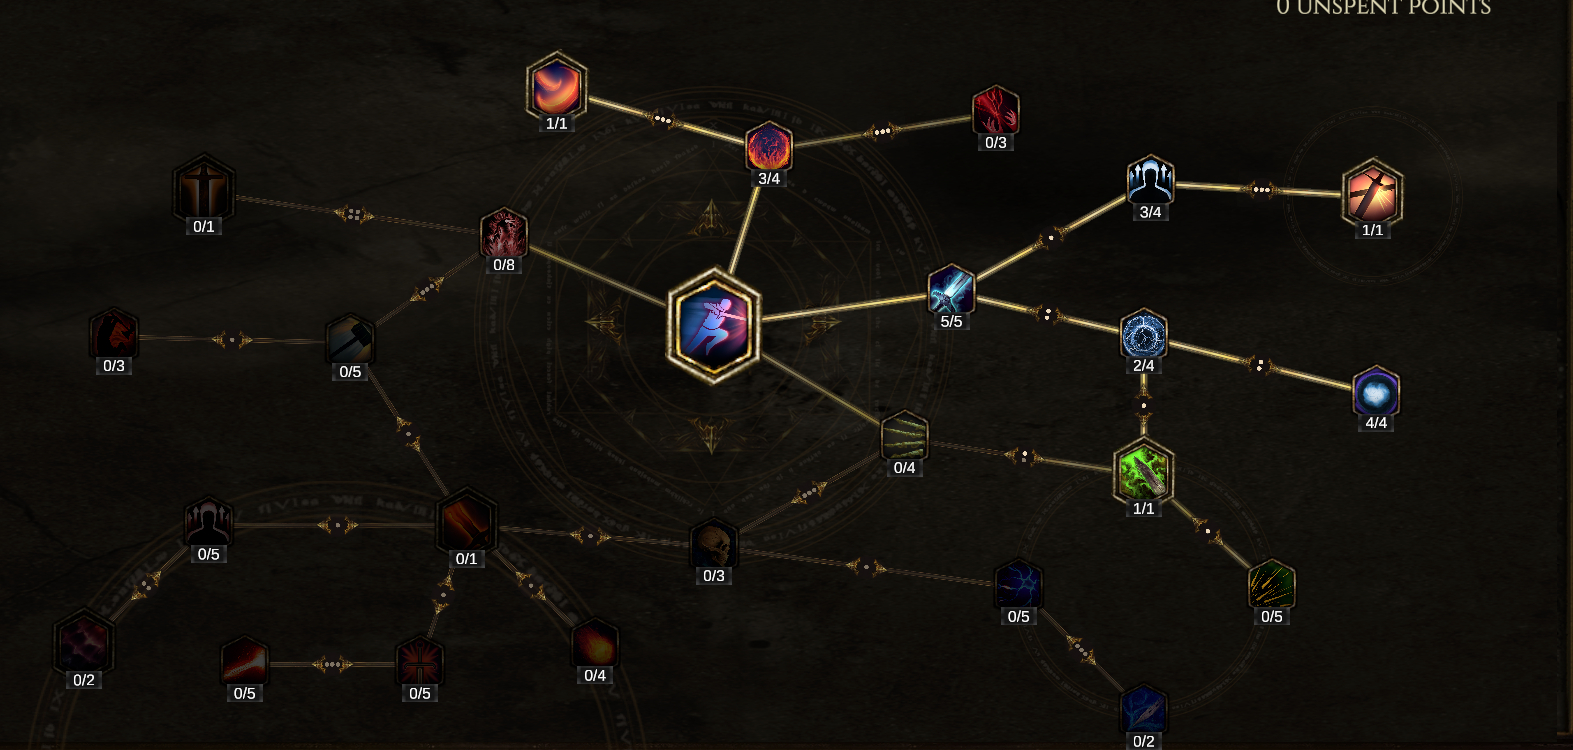
SKILL & PASSIVE TREE
The skill and passive tree is as optimized as it gets and plenty of nodes actually are not as effective as they are supposed to be but certainly will be fixed shortly, hence I have specced into them already.
PASSIVES


ITEMS & STAT
Instead of writing what’s best for each slot, I will rather explain which stats seem to be the best.
STATS EXPLANATION
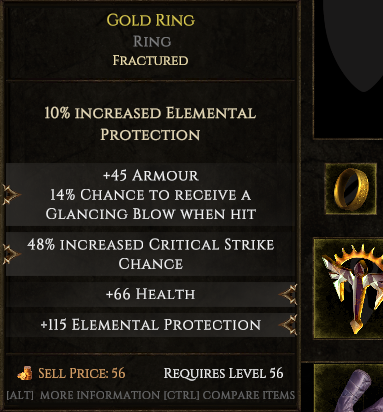
#OP Increased Elemental Protection - Gold Rings 20% increased elemental protection is mad strong because we don’t get much %increased of that stat, giving us a 40% total increase if both rings have it.
#1 Critical Strike Multiplier - This increases your damage the most and getting it on every piece except for your weapon is the best way to go.
#2 Critical Strike - This is a flat number. The more you get it through weapon & skill specs, the better. The more you have it, the less you need “Inceased Critical Strike Chance”
#3 Increased Critical Strike Chance - You should balance your Increased Critical Strike Chance through your Rings/Amulet/Relics. You can easily go over the cap and you will never know exactly when it’s 100%. If every hit of yours is yellow, you have 100%. Try removing one critical strike item and see if you sometimes hit white, if you do, you’re close to your 100% critical strike chance.
#4 Increased Health % - This pushes your HP the highest and the more you have it, the better. Definitely get it on body, no matter what.
#5 Added Health - Again, same as above but often less effective.
#6 Glancing Strike - This is your go to Prefix on most of the items, Glancing Strike makes the hit which you receive be halved. Even without the armor, it would still be very good!
#7 Elemental Protection - This is your best way to get resistances. I don’t grab any gear which has a single element, as it’s simply a waste of slot.
#8 Vitality - Same as Elemental Protection. Vitality gives you +15 void/poison/ethereal protection, it’s the most efficient way to get these resistances up.
#9 Strength - It increases your Erasing Strike’s damage, but damage is none of our concern, so while it is not the best, it’s still acceptable.
#Niche 1 - Mana Efficiency, it might help you with doing Volatile Reversal rotations slightly better
#Niche 2 - Increased Cooldown Reduction, this also might help you with Volatile Reversal rotations and also brings you Holy Aura off cooldown quicker, enabling the buff again earlier.
#Terrible 1 - Attunement is a bait, instead of 15 resistances like Vitality, it gives you only +5. Avoid it. The tag on the skill is for the spell effects of the Erasing Strike, not the initial hit which we use.
#Terrible 2 - Increased Physical Damage is very weak because we actually are +300 - 400% increased physical damage most of the time.
#Terrible 3 - Movement Speed, we don’t need this at all because we mostly Lunge at enemies
#Terrible 4 - Set effect affixes, it might seem like you gain a lot more than the normal version but the truth is that you will never get the set effects on all possible items of your equipment for it to pay off.
My items currently are high/mid-tier. There is a lot of space for improvements everywhere!
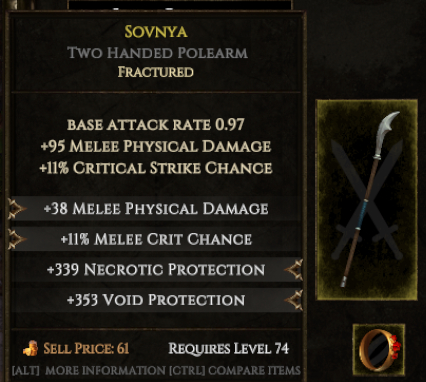
WEAPON
Best base: Sovnya / Naginata for lower levels
Don’t take any bases with <9% Crit. You should always craft / make sure you have T5 Melee Crit + T5 Added Melee Damage and the rest is luxury!
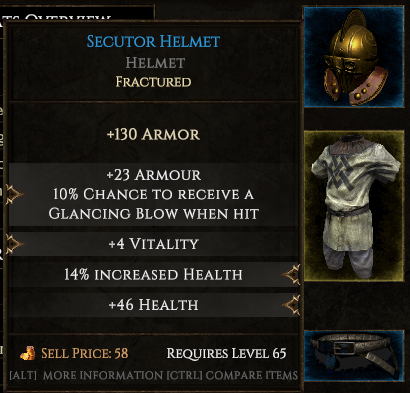
HELMET
Best base: Secutor Helmet
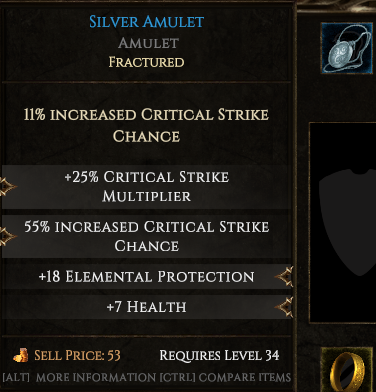
AMULET
Best base: Silver Amulet ← Always
BODY
Best base: Secutor Armor

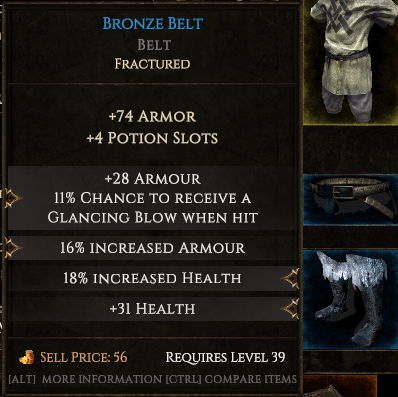
BELT
Best base: Bronze Belt
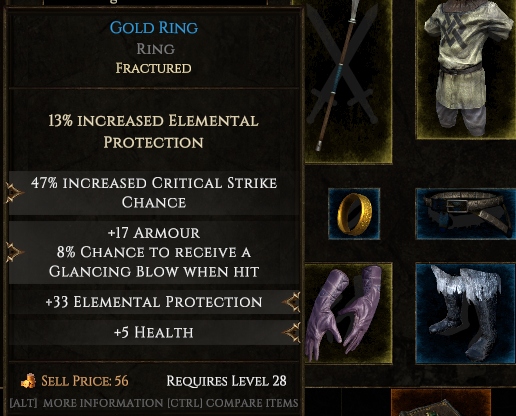
RINGS
Best base: Gold Ring
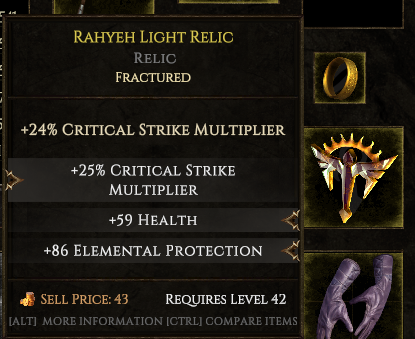
RELIC
Best base: Rahyeh Light Relic ← Always crit multi relic
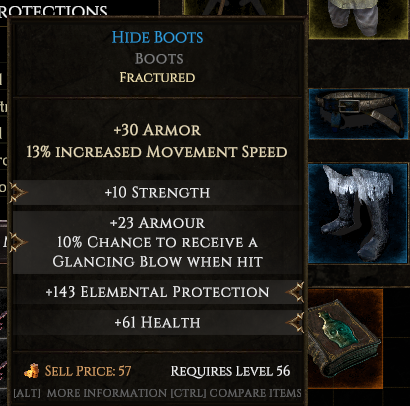
BOOTS
Best base: Secutor Boots
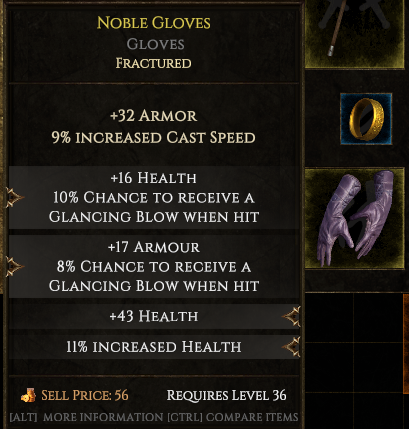
GLOVES
Best base: Lagonian Gauntlets
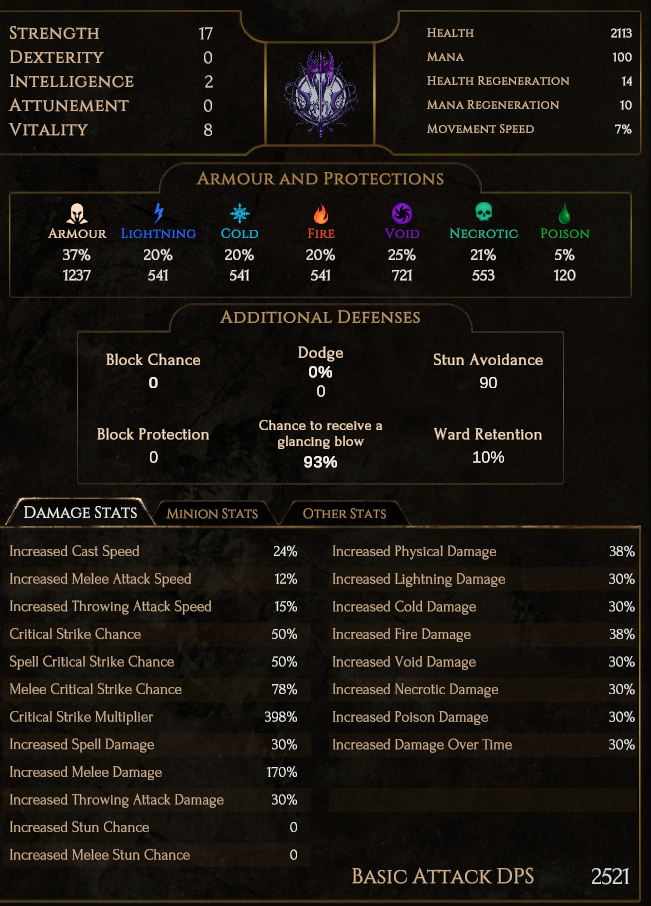
UNBUFFED STATS
CRAFTING
Put your item description setting to “short”, as the only important thing for you is to know the base and rarity.
Every time when you visit the town or every second monolith, you should check the shop for items and buy all Runes of Shattering.
The shop keeper can often sell really well rolled items, to a point where I think it might be intentionally biased like that.
If the shop loads items one by one, it’s new stock. If it loads instantly, you can close it.
The shop currently refreshes after 10 minutes since you last opened it, meaning that if you open it earlier than 10 minutes, the stock will not refresh and you have to wait another 10 minutes.
It’ very viable to get crafting bases and items by leaving the game to the login screen and starting again - the shop refreshes this way but you lose your Monolith’s progress.
EARLY GAME CRAFTING - SAVING UP
When starting the game, you should rarely craft. Pick up only blues / rares with good affixes and craft as much as you want without wasting any currencies. You will need almost all currencies later except Refinement. Crafting is also bad early game because you will need to swap out bases quite often until level 71.
MID TIER CRAFTING
Once you reach monolith / arena, you can start using currencies a bit more. At this point I still highly suggest to not waste many Scroll of Stability & Guardian since these should be reserved for high tier crafting.
You want to start off by crafting the most important slots of your equipment with the most important affixes. For us these would be
Melee weapon with T5 Melee Crit + T5 Melee Physical damage
Silver Amulet with T5 Melee Crit + T5 Critical Multiplier
+20 Critical Multiplier Relic with T5 Increased Crit + T5 Critical Multiplier
Chest with T5 increased %Health + T5 Added health
I highly suggest using all your currencies as much as possible except again Stability and Guardian. You will only need these 2 for endgame crafting.
Silver Amulet, Gold Rings, Crit Multi relics can also be treated as high tier crafting items as these bases don’t improve over the levels.
I used most of my Runes of Cleansing on Naginatas as weapon is the most important part of this equipment. I cleansed every +10% Critical Strike Chance version and attemped to craft T5+T5. Used stability once I had at least 3 total tiers, Stability until I had 7 tiers and Guardian til 10 tiers.
HIGH TIER CRAFTING
You should only look for the best bases and once you’ve achieved T5+T5+T5+T3( up to 5), you should completely stop looking for the item as that requires attention and time from you.
You should be picking up ONLY blues and yellows since whites will eventually have too high instability to be crafted properly. If the yellows have A total of 12 tiers of good stats, you can try using the Rune of Removal if it has an unwanted stat. If the blues have at least T4+T4, it’s worth crafting; if not, it’s most likely a waste of Scroll of Stabilities.
I typically slam 3-5x with Stability and even though it might be risky, it has to be done as otherwise you will never have realistic instability to reach 3-4x T5.
I would avoid picking up shards completely at this point as well, since you will not use 90% of them and if you do happen to run out of some, you can simply shatter it from equipment which often give you more than a single shard.
It’s important to first reach T5s when crafting an item and then deal with other stats as T4 > T5 will yield more stats than other tiers such as T1 > T2.
FARMING
ARENA & MONOLITH
Currently the fastest way to level up is the Arena and the fastest way to gear up is the Monolith. The most effective way for peaking the build is to reach level 71 in the Arena to unlock all high tier bases and then farm Monolith.
Arena is also good if you need to level up your skills quick. I managed to respec one skill multiple times each ~ 100 waves arena run.
The fastest way to farm up in Monolith is to speedrun it as much as you can til the end until you have at least 10 monoliths done so you would have more mods active which last for longer. Typically you’ll be sitting around 90 - 140 rarity.
Mods which you should not run are - dodge / 3x increased defenses as these will simply slow you down too much.
Everything else, always try to pick as high “times” and “rarity” as possible. Once you have reached high rarity, you can spend more time killing mobs as well but DO NOT FOCUS RARES they do not have a higher loot threshold and waste a lot more time than mobs which you can one shot easily. Your prime focus is still the big loot chests.
Remember that in the Monolith barrels drop loot but boxes do not. In acts boxes do drop loot.
There is also a shop keeper in the arena, right below the stash, it might be hard to spot her at first.
I will try to update the build as much as I can (:
If you have any questions, leave a comment!


